CVE mirror troubleshooting#
This topic provides guidance on the following actions:
Understanding CVE ingestion#
The initial setup for CVEs in Anaconda Server is triggered during install, when you first enter
a license—either from the UI or by making a call to the rest end point at https://<FQDN>/api/system/license. When
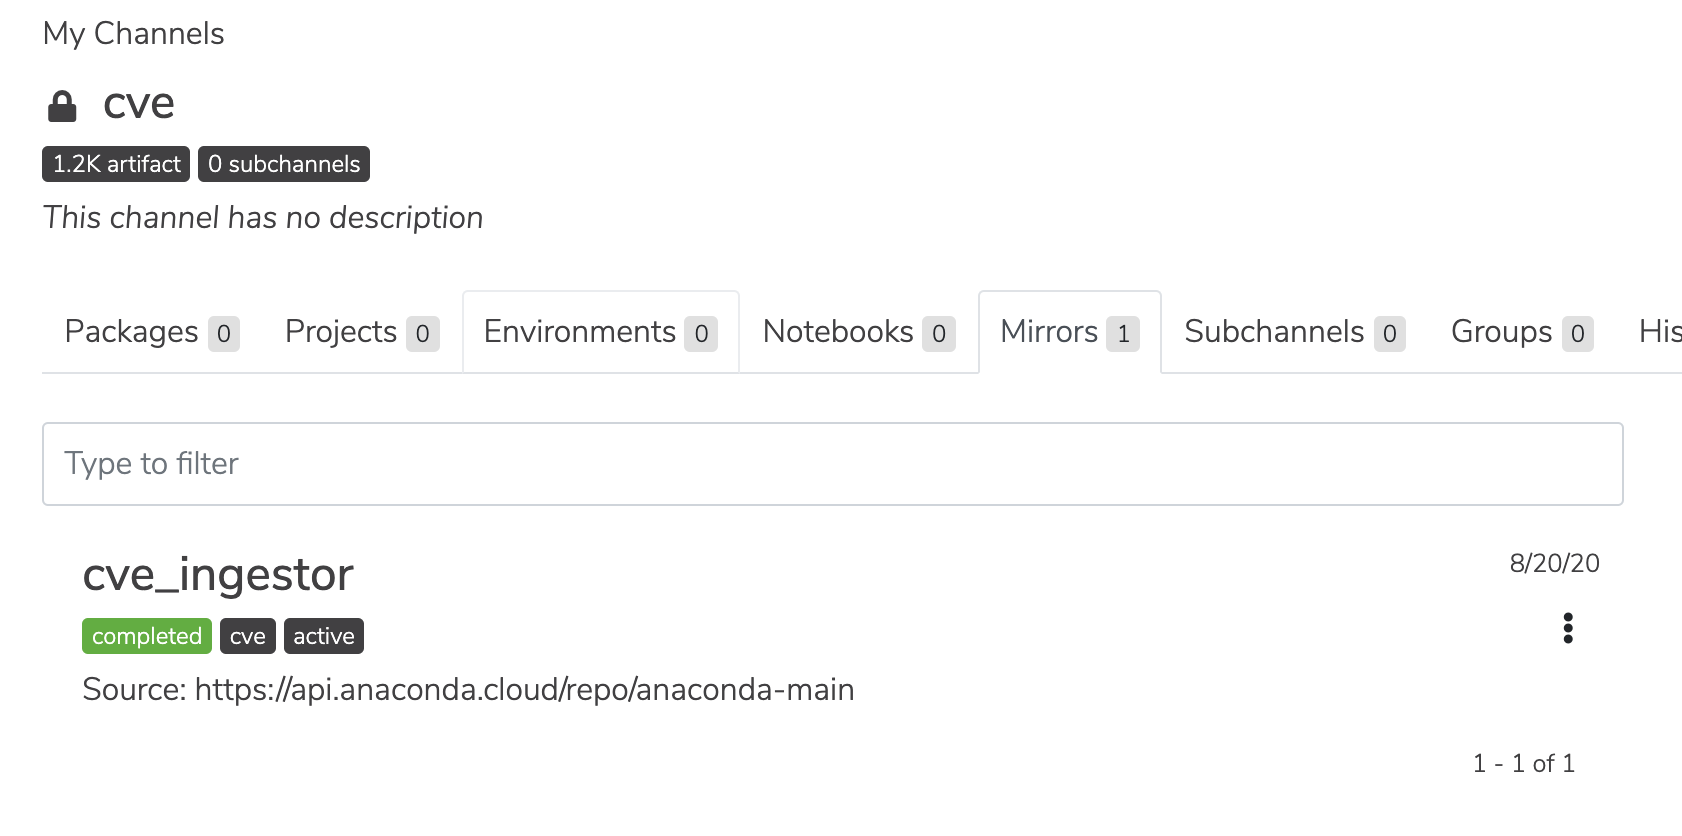
that happens, Anaconda Server creates a channel called cve (https://<FQDN>/channels/cve).
Note
By default, only admin users can navigate to this channel (URL). For users to be able to access this channel, an admin user must assign the Manage permission for CVEs to users from the User Management dashboard.
Anaconda Server will also set up a mirror in the channel called cve_ingestor, which will mirror all the packages in
https://api.anaconda.cloud/repo/anaconda-main by default. “Packages” in this context refers to cve metadata.

Your token is extracted from the license and used to authenticate to the CVE endpoint; without it, you will not be able to mirror from api.anaconda.cloud.
The SSL certificate that is used on api.anaconda.cloud is signed by Let’s Encrypt. This is important to know because repo.anaconda.cloud is signed by a different CA than repo.anaconda.com.
Validating CVE mirrors#
Until your mirrored packages are matched to CVEs, you will not see metadata for those CVEs. In some cases, though, even entering your license does not provide you with mirrored CVE metadata. However, you can verify the CVEs are present by going through the following steps:
Navigate to your CVE view:
# Replace <FQDN> with your fully qualified domain name.
https://<FQDN>/channels/cve
List your CVEs on the command line:
conda repo cves --list
Use the rest end point with your admin user token:
# Replace <FQDN> with your fully qualified domain name.
export api=https://<FQDN>/api
conda repo login
token=$(conda repo auth -i 2>&1 | grep -Po "Token: \K(.*)")
curl -H "X-Auth: $token"  $api/channels/cve
As an alternate to step 3, you can use the rest end point with a bearer token, in case your user token doesn’t work:
# Replace <FQDN> with your fully qualified domain name.
export api=https://FQDN/api/
export ATE_USER=<USER> ; export ATE_USER_PW=<PASSWORD>
export token=$(curl -sk -X POST -H 'Content-Type: application/json' -d '{"username":"'$ATE_USER'", "password":"'$ATE_USER_PW'"}' ${api}/auth/login | jq -r '.token')
curl -k -H 'Authorization: Bearer '$token $api/cves | jq '.'
If after these steps you find that the CVE mirroring did not work as expected, there are a few known causes for this issue persisting:
Lack of internet access or proxy. Any setup that does not have internet access or is not routed through a proxy will result in a mirror failure. This is true even if the docker host is able to connect to the internet via a proxy setting.
Solution: Ensure your proxy server is configured correctly.
Terminating proxy is replacing the certs. A terminating proxy (transparent or explicit) or network device may be replacing the certs you’ve presented to TE, which is using the default request CA bundle (Mozilla) and not the system store.
Solution: Add your custom root CA to the requests library store.
Missing root CA certs. This is especially troublesome for the Let’s Encrypt certs on the proxy.
Solution: Even with a proper configuration, it is possible that the proxy itself need to be modified to validate the certificates on the other side of the connection.
After you’ve ensured that any of the above issues you were having are resolved; api.anaconda.cloud can be reached; and the SSL validated from the API repo container is successful, you may proceed with the following CVE mirror fix:
cd /opt/anaconda # or wherever TE docker-compose.yml is located.
docker-compose exec repo_api /bin/sh -c echo | openssl s_client -connect api.anaconda.cloud:443 2>/dev/null | grep "Verify return code"
If the connection is working correctly, you should receive a confirmation like the following:
Verify return code: 0 (ok)
Fixing CVE mirror failure during setup#
Note
Ensure you are using TE version 6.1.2 or later before attempting this procedure.
If you work through the steps above and find that your channels still do not contain CVEs, try the following steps:
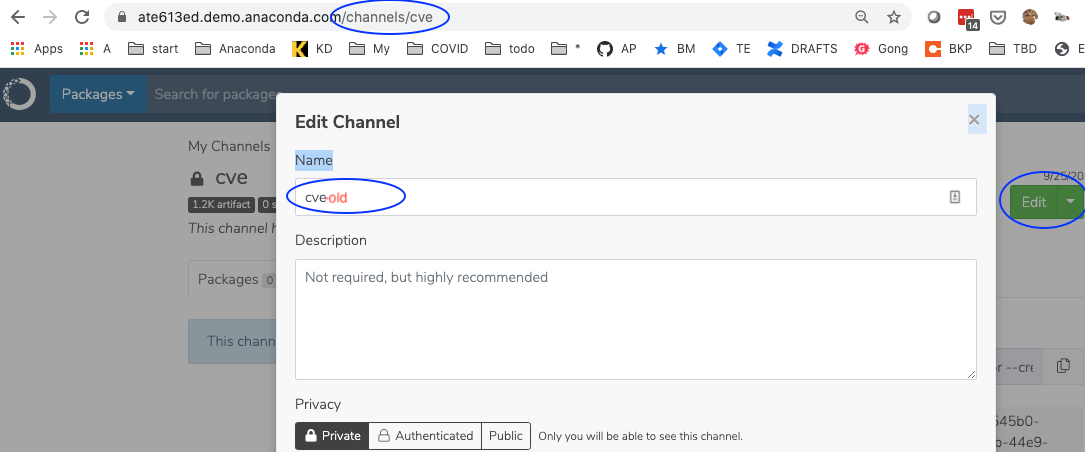
Rename the CVE channel by navigating to the following path, clicking edit, and renaming the channel:
# Replace <FQDN> with your fully qualified domain name.
https://<FQDN>/channels/cve

Get the bearer token:
# Replace <FQDN> with your fully qualified domain name.
export api=https://FQDN/api/
export ATE_USER=<USER> ; export ATE_USER_PW=<PASSWORD>
export token=$(curl -sk -X POST -H 'Content-Type: application/json' -d '{"username":"'$ATE_USER'", "password":"'$ATE_USER_PW'"}' ${api}/auth/login | jq -r '.token')
Call put
https://<FQDN>/api/system/licenseendpoint:curl -k -X PUT -H 'Authorization: Bearer '$token $api/system/license
Verify that the new CVE channel and mirror are created by navigating to your CVE view:
# Replace <FQDN> with your fully qualified domain name.
https://<FQDN>/channels/cve
Verify that CVE data is now available. If it is, you can safely delete the old CVE channel by navigating to the following path and deleting the channel from the green Edit button’s dropdown options:
# Replace <FQDN> with your fully qualified domain name and <OLD_CVE> with the name of the old CVE channel.
https://<FQDN>/channels/<OLD_CVE>