Packages#
Anaconda Server enables you to upload packages (conda, cran, wheel, egg, sdist, etc.) to the repository and store them in several different channel structures. Each package contains specific metadata for that package along with the dependencies and dependents for the package.
This topic provides guidance on the following actions:
Uploading a package#
Preparation for uploading packages differs depending on your package type. Please follow the relevant guide for your respective packages:
Via the UI:#
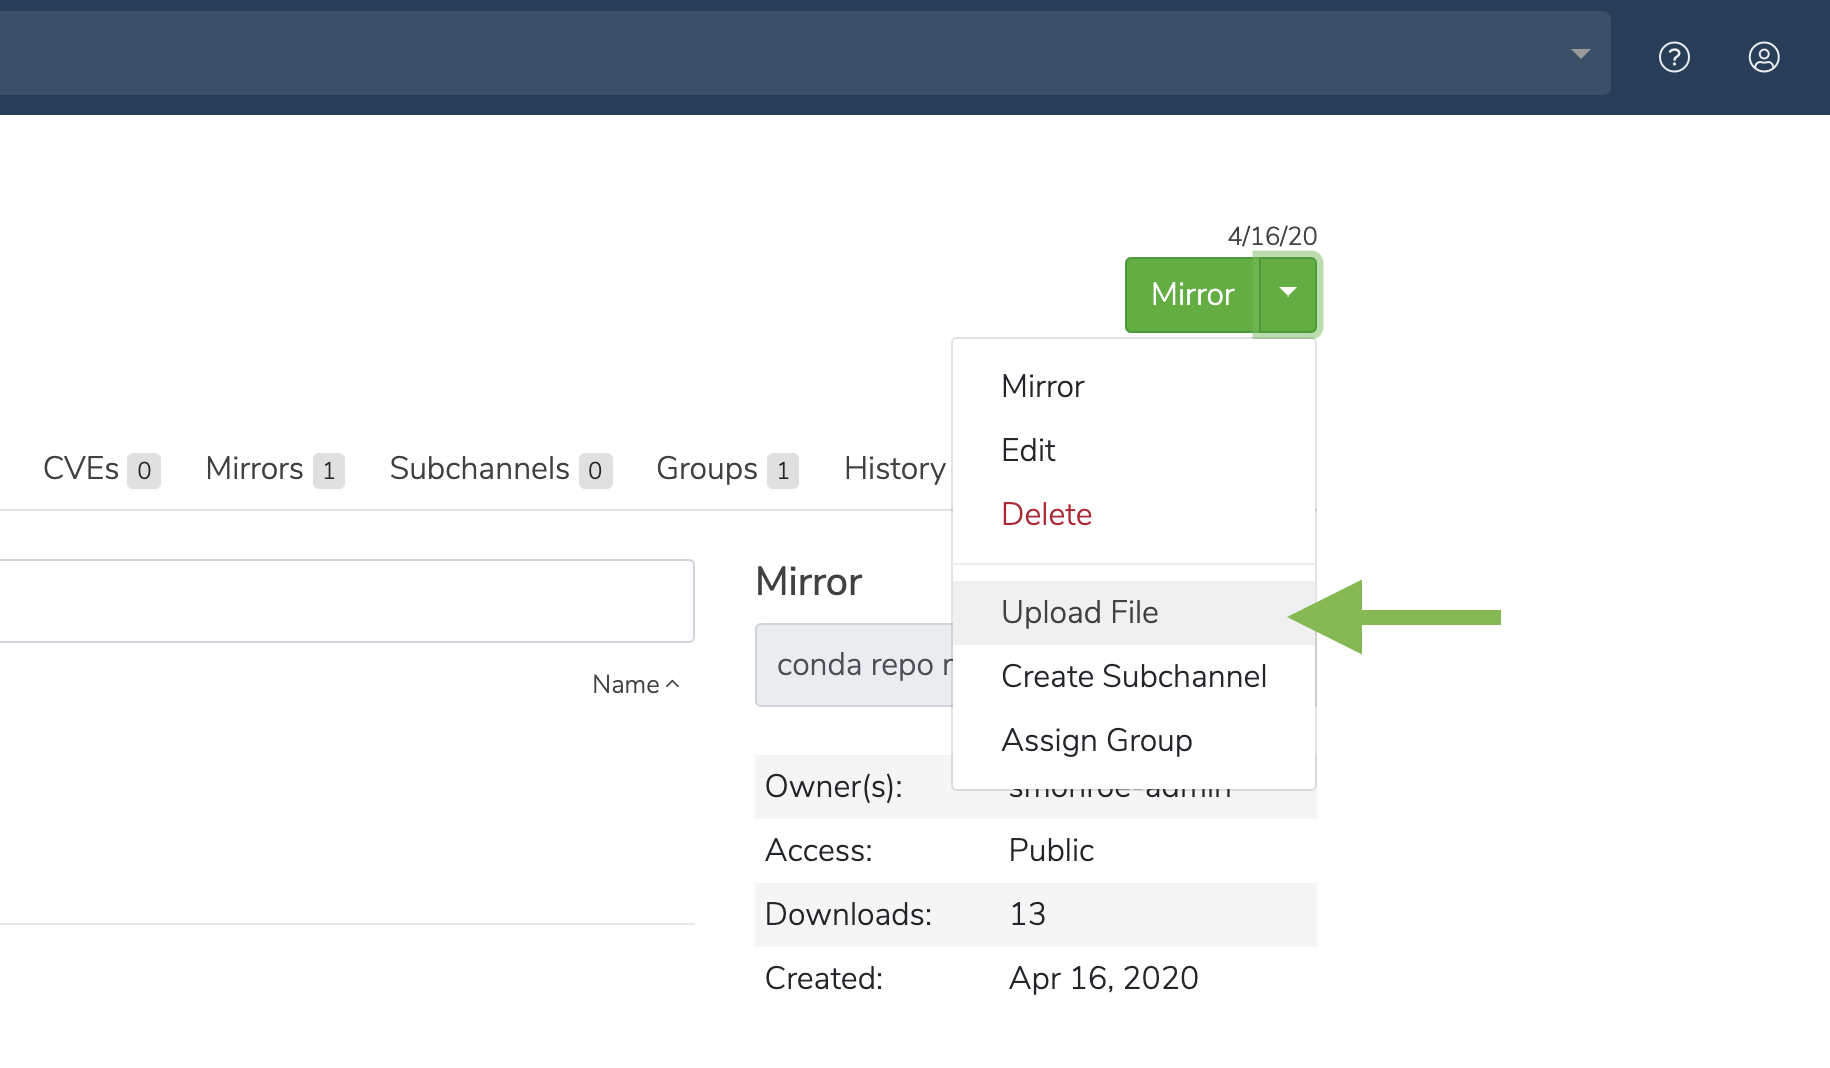
Click the green dropdown button in the top right corner, and then click Upload File.
On the Upload a File screen, select the type of file you’d like to upload from the dropdown.
Click the Browse button to find your file and add it to the page.
Click Upload.
Via the CLI:#
To upload into the default user channel:
# Replace <PACKAGE> with the package name
conda repo upload <PACKAGE>
To upload multiple packages:
# Replace <PACKAGE1> etc. with the package names
conda repo upload <PACKAGE1> <PACKAGE2>
To upload into a specific channel:
# Replace <PACKAGE> with the package name and <CHANNEL_NAME> with the channel name
conda repo upload - <CHANNEL_NAME> <PACKAGE>
By default, the system will try to identify the package type automatically. However, you can also provide the file type yourself:
# Replace <CHANNEL_NAME> with the channel name
conda repo upload -t conda -c <CHANNEL_NAME> package.tar.bz2

# Or, to upload a notebook:
# Replace <CHANNEL_NAME> with the channel name
conda repo upload -t ipynb -c <CHANNEL_NAME> notebook.ipynb
Downloading a package#
On a package details page, click on a file name to download the file.

Viewing package details#
Via the UI:#
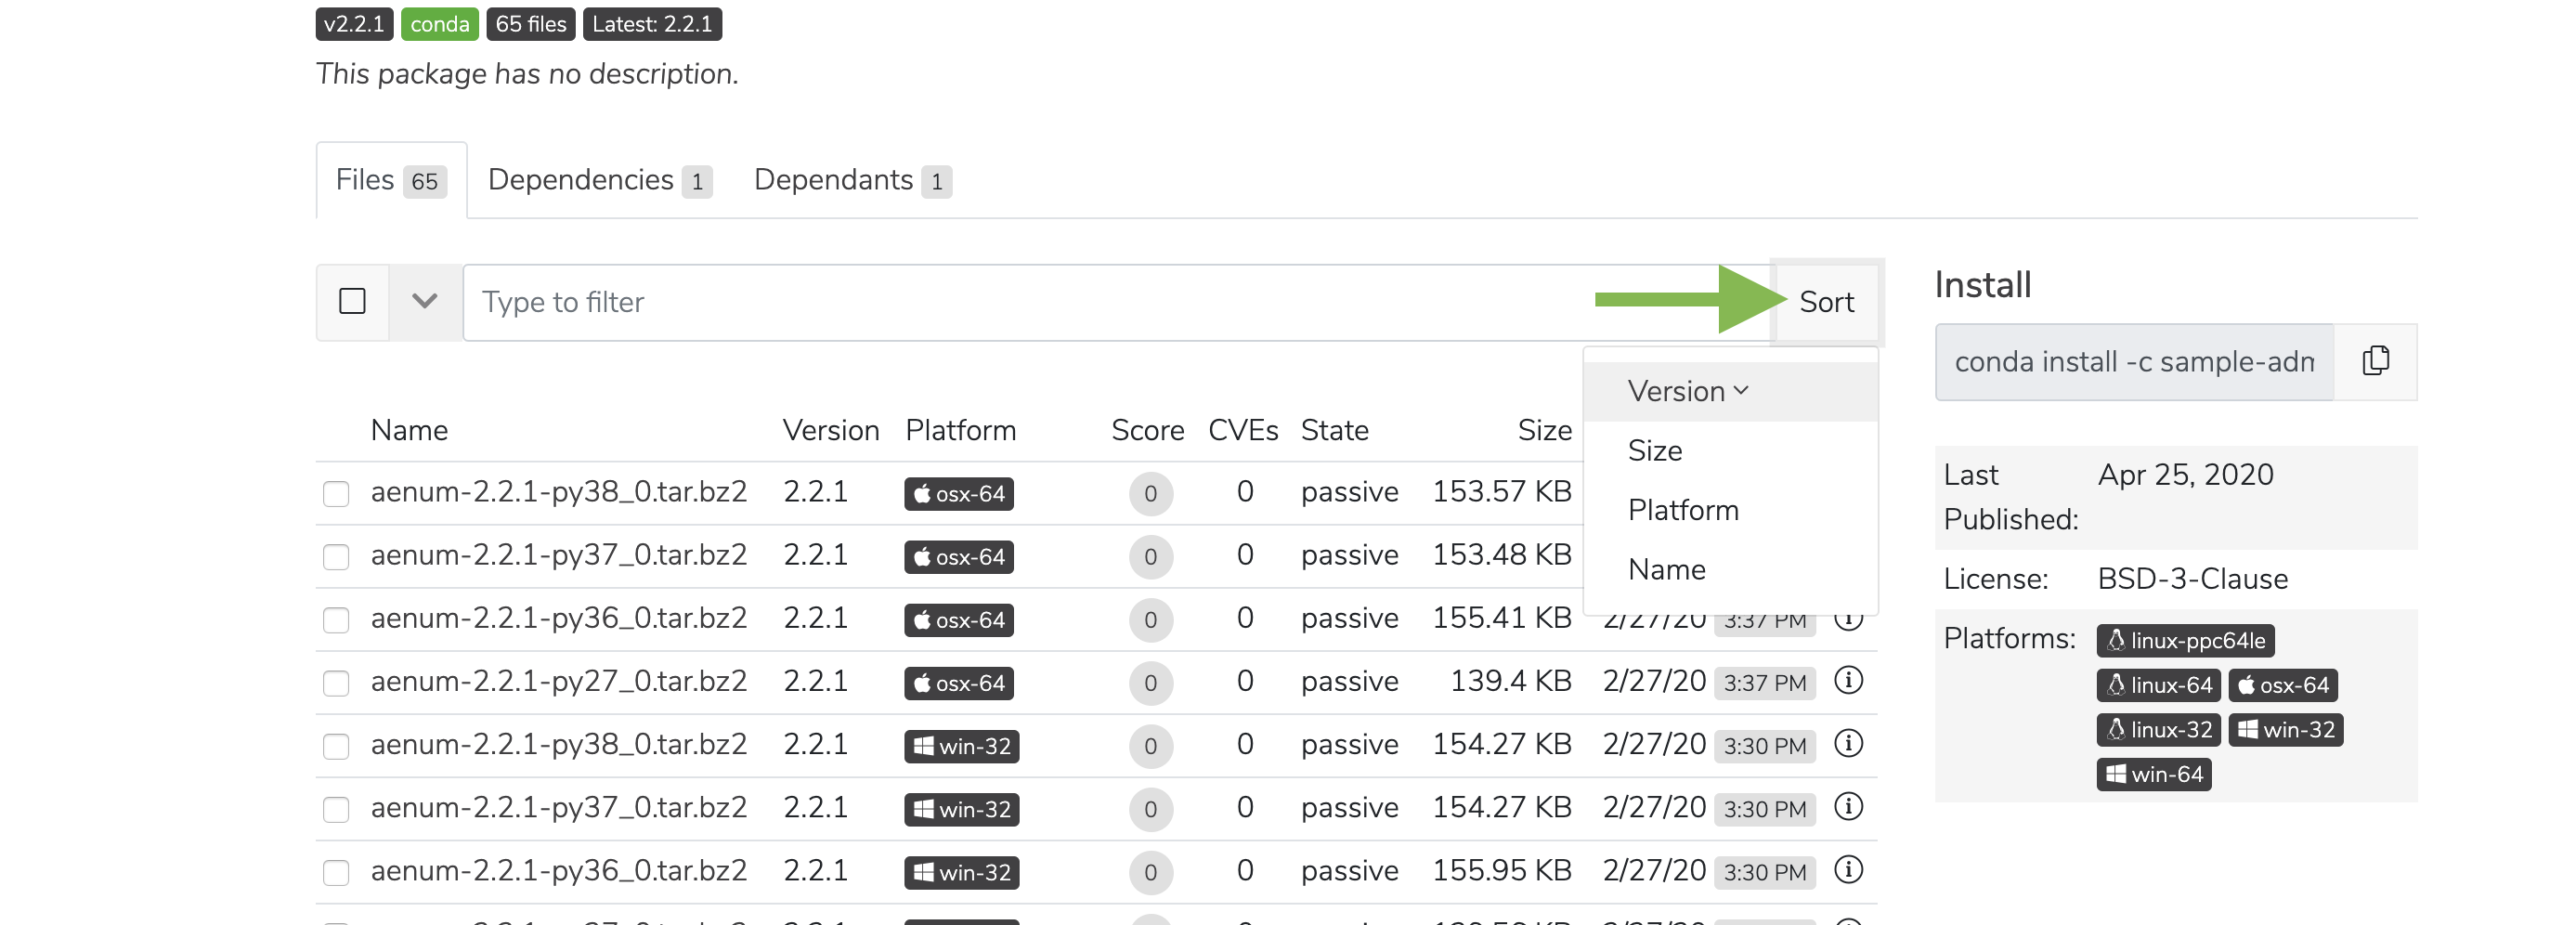
Click anywhere on a package to view its details.
You can then click the Sort button to sort files by version, size, platform, and name.

Via the API:#
GET /api/channels/<CHANNEL_NAME>/artifacts/<ARTIFACT_TYPE>/<ARTIFACT_NAME>
GET /api/channels/<CHANNEL_NAME>/artifacts/<ARTIFACT_TYPE>/<ARTIFACT_NAME>/readme
GET /api/channels/<CHANNEL_NAME>/artifacts/<ARTIFACT_TYPE>/<ARTIFACT_NAME>/cves
GET /api/channels/<CHANNEL_NAME>/artifacts/<ARTIFACT_TYPE>/<ARTIFACT_NAME>/files
GET /api/channels/<CHANNEL_NAME>/artifacts/<ARTIFACT_TYPE>/<ARTIFACT_NAME>/dependencies
GET /api/channels/<CHANNEL_NAME>/subchannels/<SUBCHANNEL_NAME>/artifacts/<ARTIFACT_TYPE>/<ARTIFACT_NAME>
GET /api/channels/<CHANNEL_NAME>/subchannels/<SUBCHANNEL_NAME>/artifacts/<ARTIFACT_TYPE>/<ARTIFACT_NAME>/readme
GET /api/channels/<CHANNEL_NAME>/subchannels/<SUBCHANNEL_NAME>/artifacts/<ARTIFACT_TYPE>/<ARTIFACT_NAME>/cves
GET /api/channels/<CHANNEL_NAME>/subchannels/<SUBCHANNEL_NAME>/artifacts/<ARTIFACT_TYPE>/<ARTIFACT_NAME>/files
GET /api/channels/<CHANNEL_NAME>/subchannels/<SUBCHANNEL_NAME>/artifacts/<ARTIFACT_TYPE>/<ARTIFACT_NAME>/dependencies
Via the CLI:#
# Replace <CHANNEL_NAME> with the channel name
conda repo channel --list-file<CHANNEL_NAME> --full-details
Viewing package metadata#
Click the information icon to view a file’s metadata.

Managing a package#
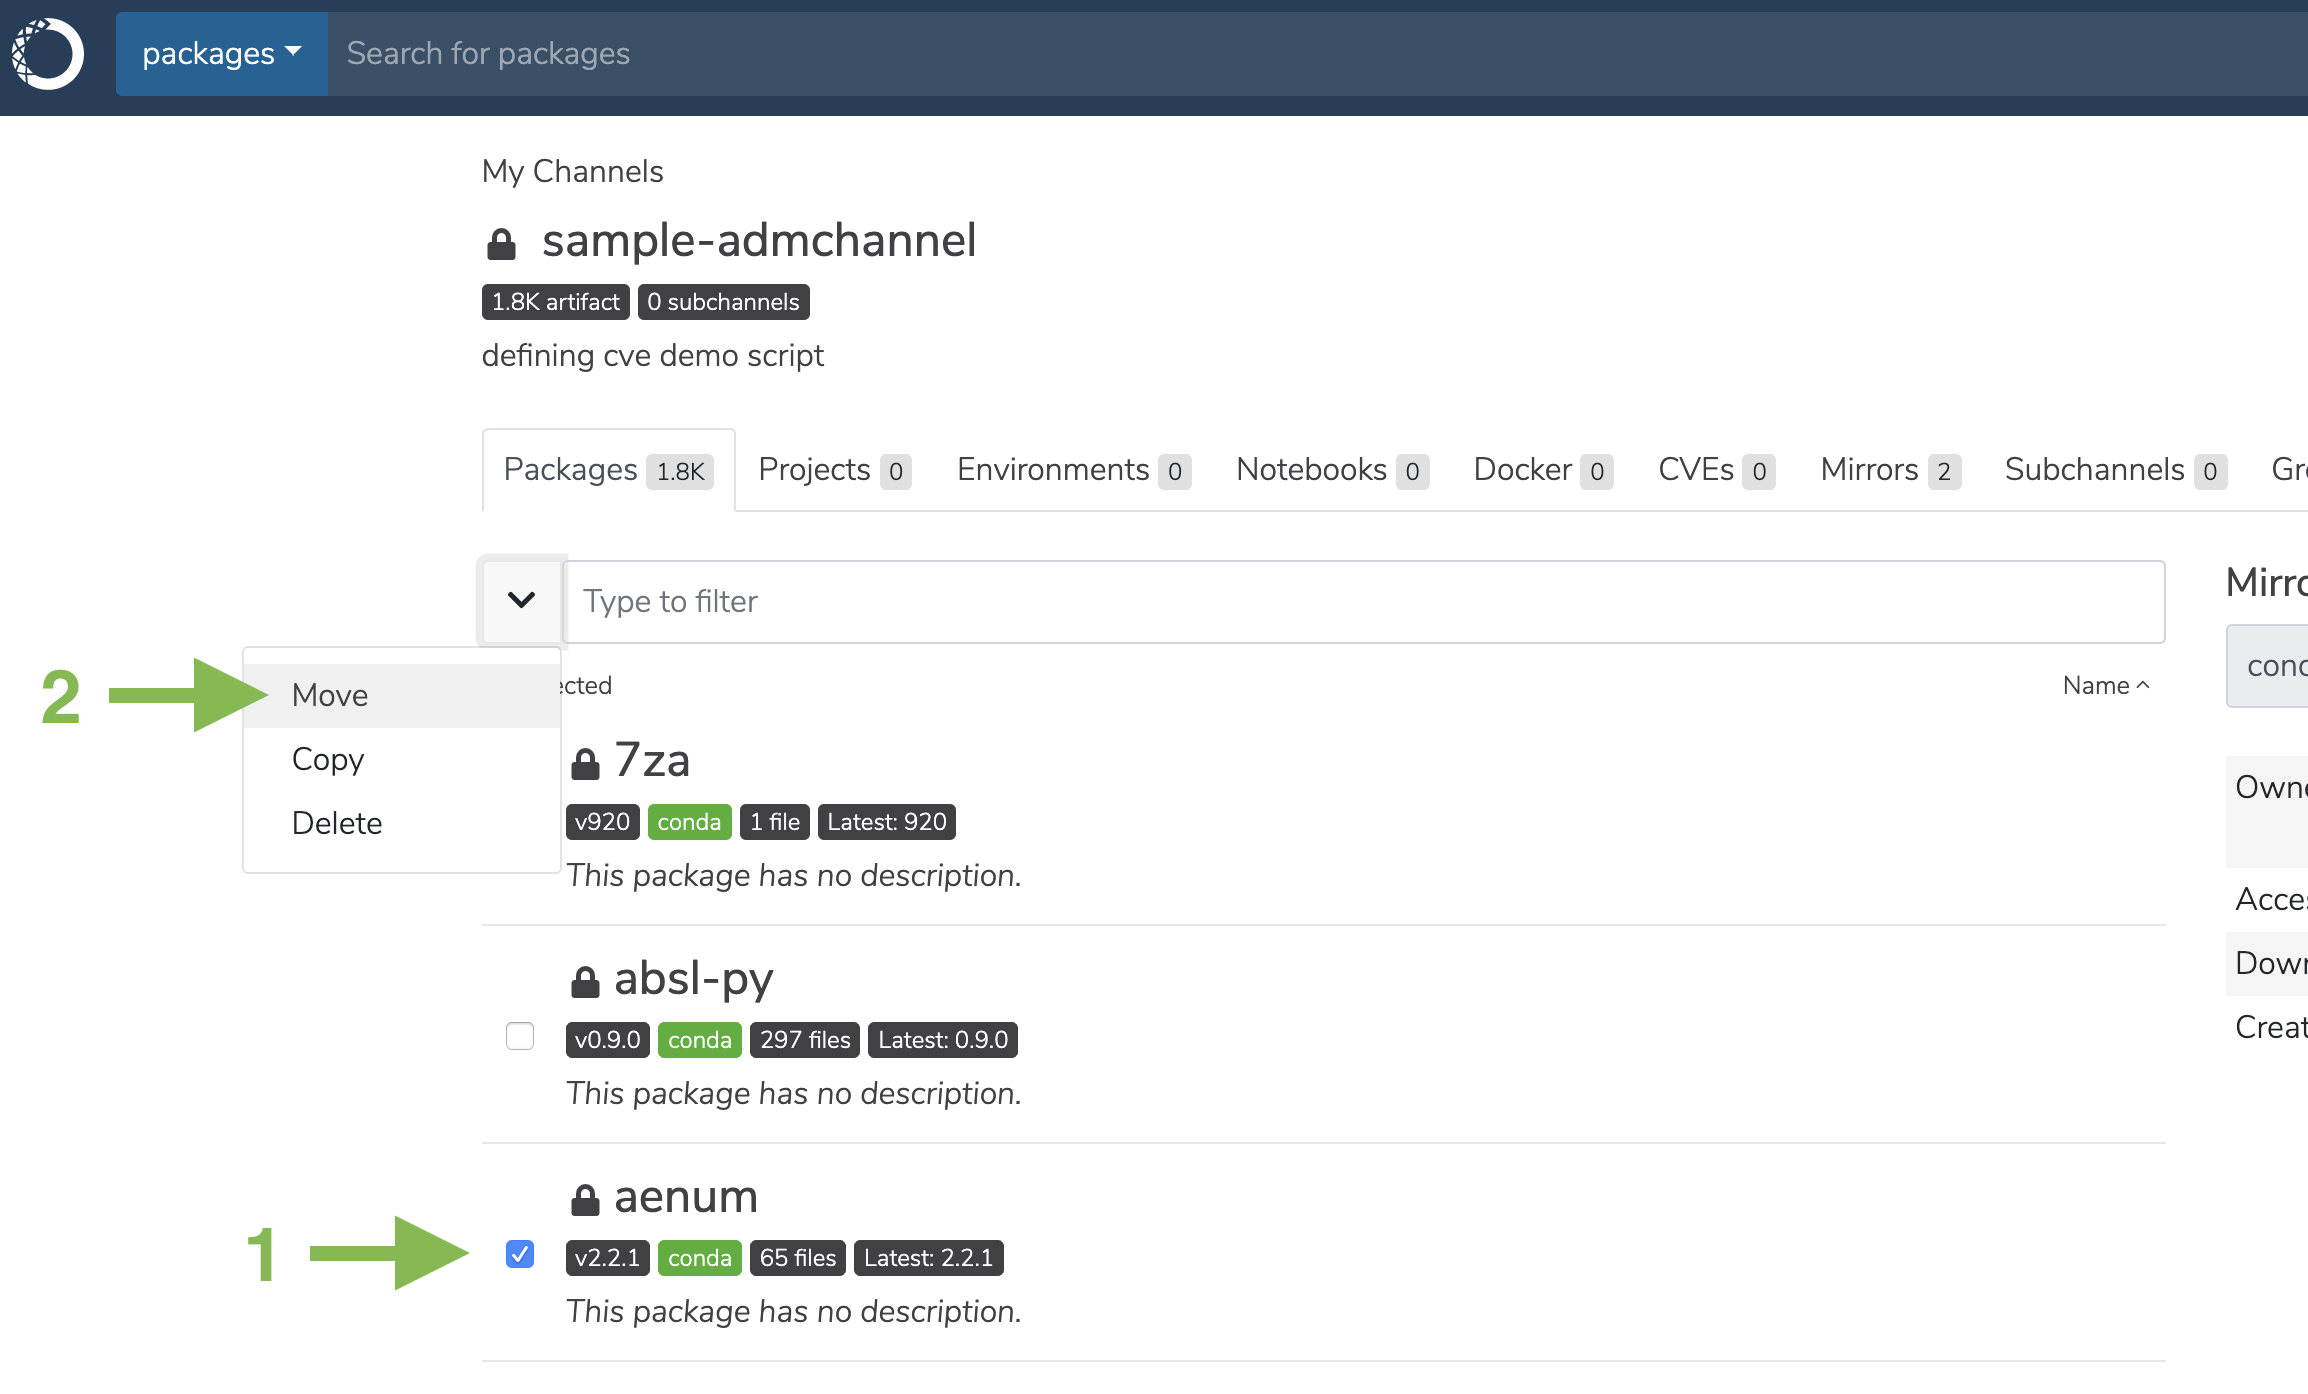
Check the box next to a package.
Click the dropdown next to the search bar. You may then move, copy, or delete the package.

Deleting a package#
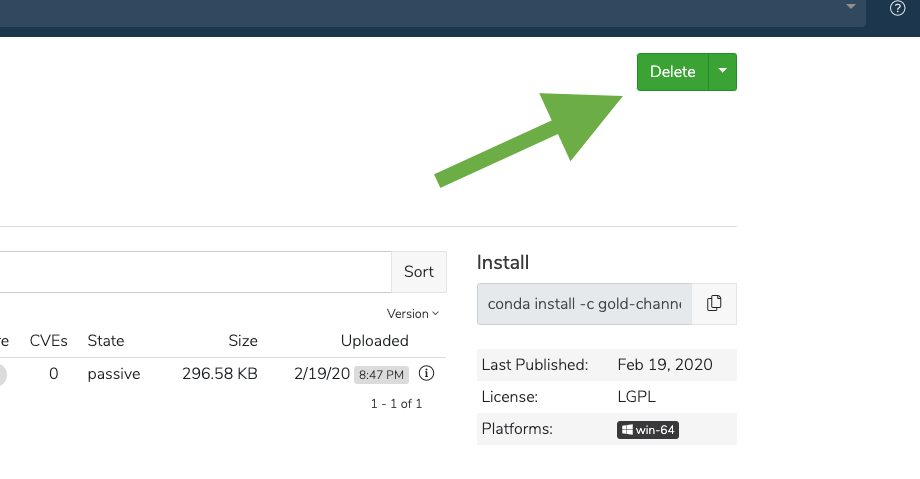
Click the green Delete button to delete a package. You will be prompted to confirm that you wish to delete the Package. Click Delete to confirm.

Via the UI:#
On a package details page, navigate to the Files tab to see all the versions of a given package.
Select one or more packages, and then click on the down arrow to the left of the filter field and click Delete.
Via the API:#
# Replace placeholders in <BRACKETS> with the applicable information
DELETE /api/channels/<CHANNEL_NAME>/artifacts/<ARTIFACT_TYPE>/<ARTIFACT_NAME>
DELETE /api/channels/<CHANNEL_NAME>/subchannels/<SUBCHANNEL_NAME>/artifacts/<ARTIFACT_TYPE>/<ARTIFACT_NAME>
Via the CLI:#
# Replace placeholders in <BRACKETS> with the applicable information
conda-repo remove [--family]<CHANNEL_NAME>/<SUBCHANNEL_NAME>[::<PACKAGE>[/<VERSION>[/<FILE_NAME>]]]
