Updating your domain#
To update your Anaconda Server domain, you need to update the domain variables in both the .env and kc.yaml files:
Open a terminal and connect to your instance of Anaconda Server.
Enter to your installer directory by running the following command:
# Replace <INSTALLER> with your installer directory
cd <INSTALLER>
Make a copy of the current
.envfile for reference and/or recovery purposes:cp .env .env.old
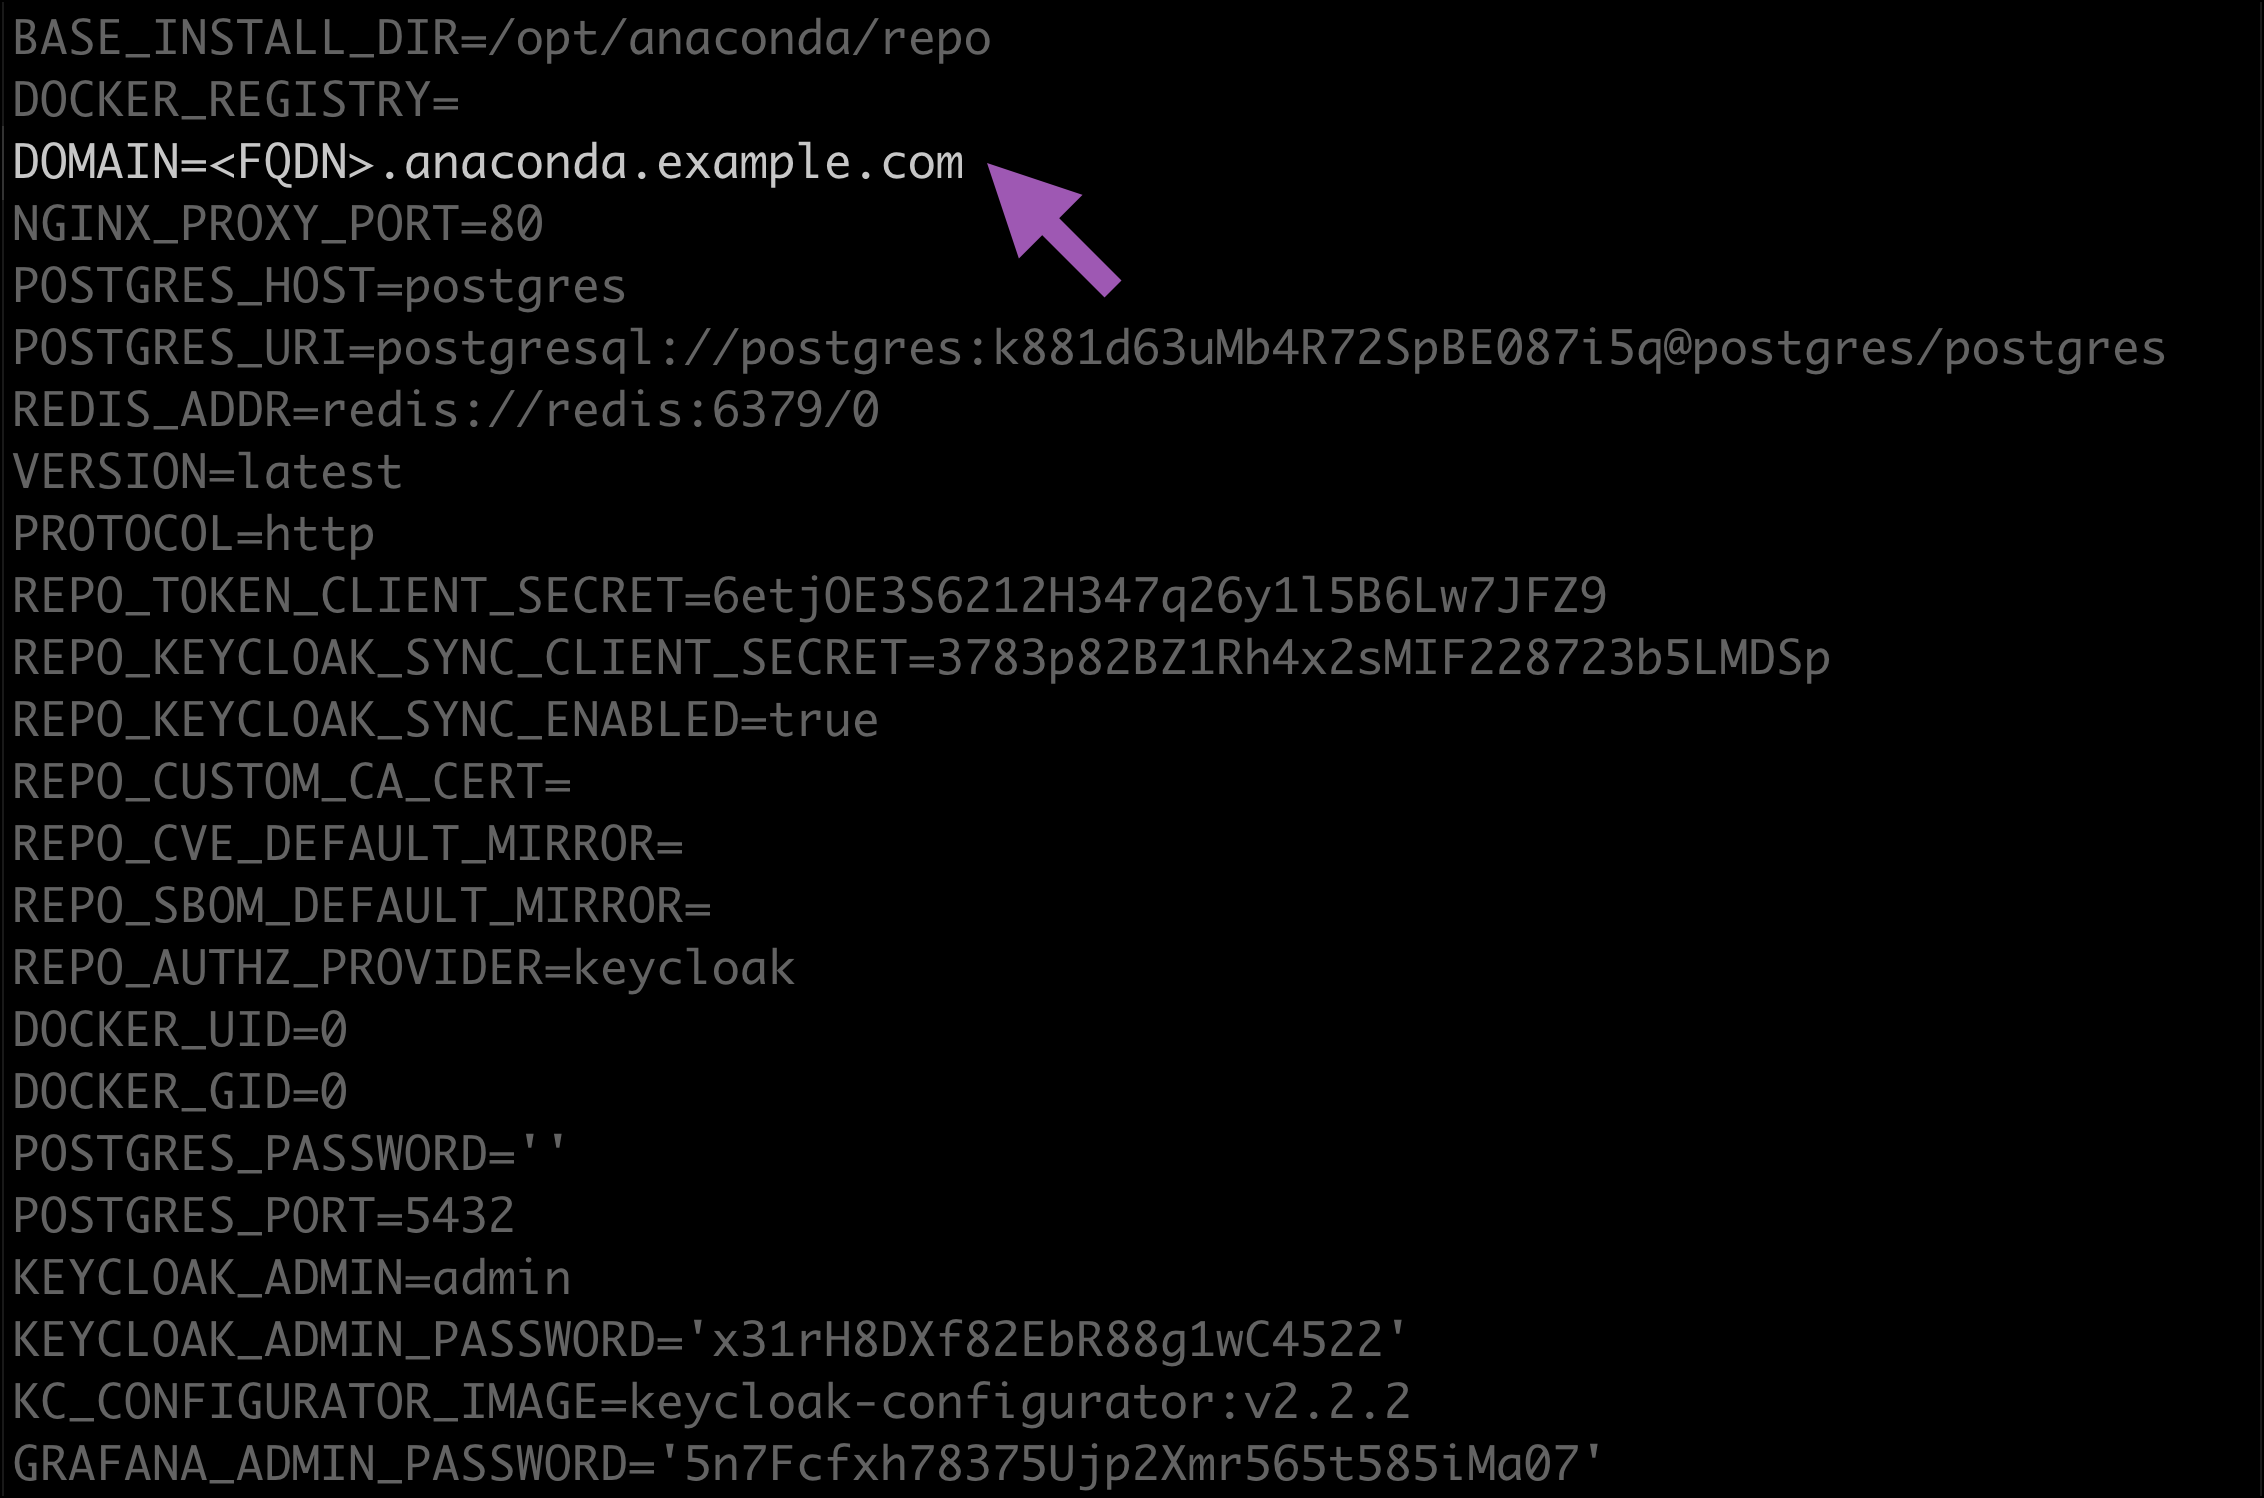
Using your preferred file editor, open the
.envfile.Update the
DOMAINvariable to your new domain.Save your changes and close the file.
Enter your keycloak directory by running the following command:
cd keycloak/
Using your preferred file editor, open the
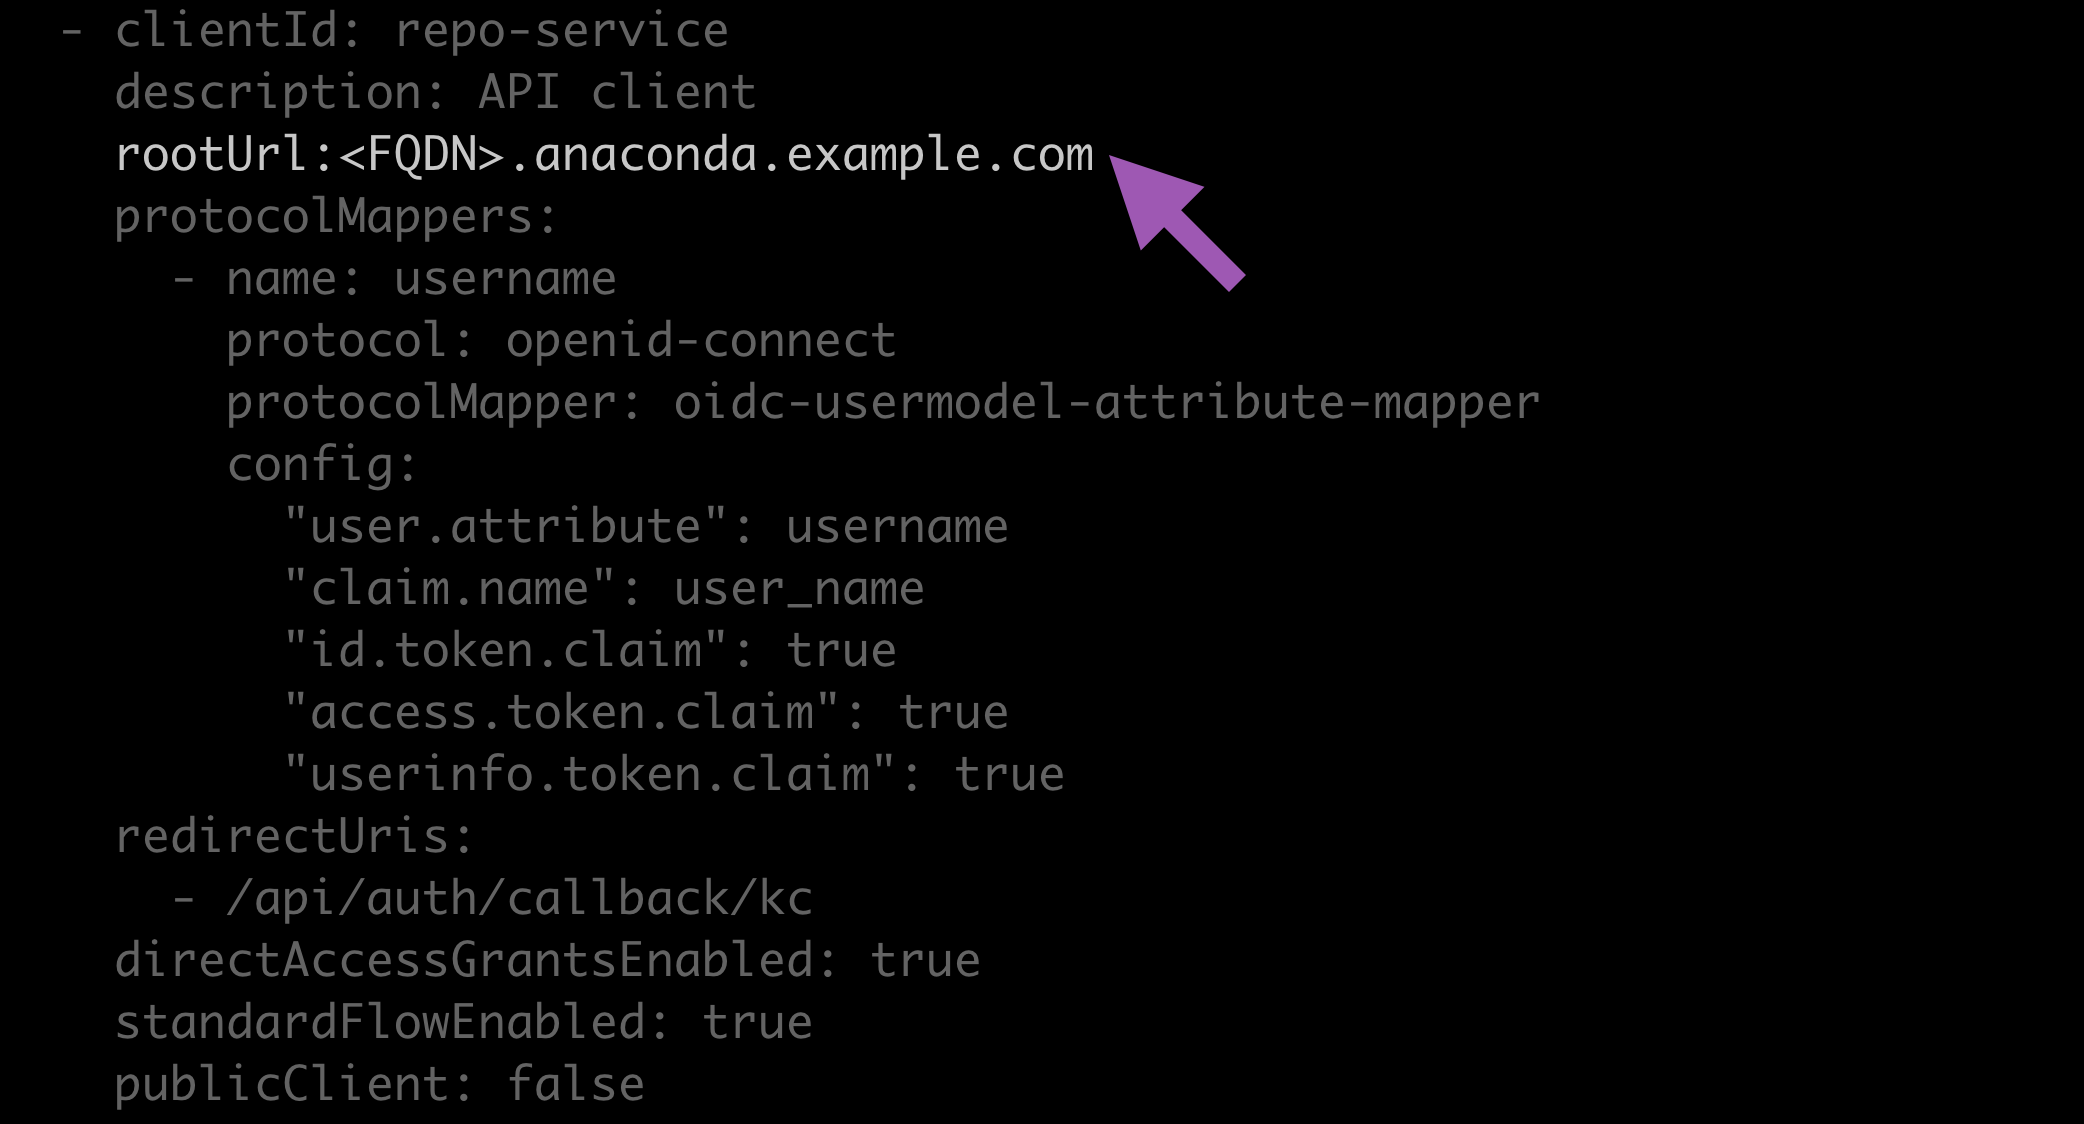
kc.yamlfile.Locate the
clientId: repo-servicesection of the file and add the following line:Restart your pods and apply your changes by running the following commands:
docker compose up -d
Open a browser and log in to the Keycloak administrative console.
Verify you are on the dev realm.
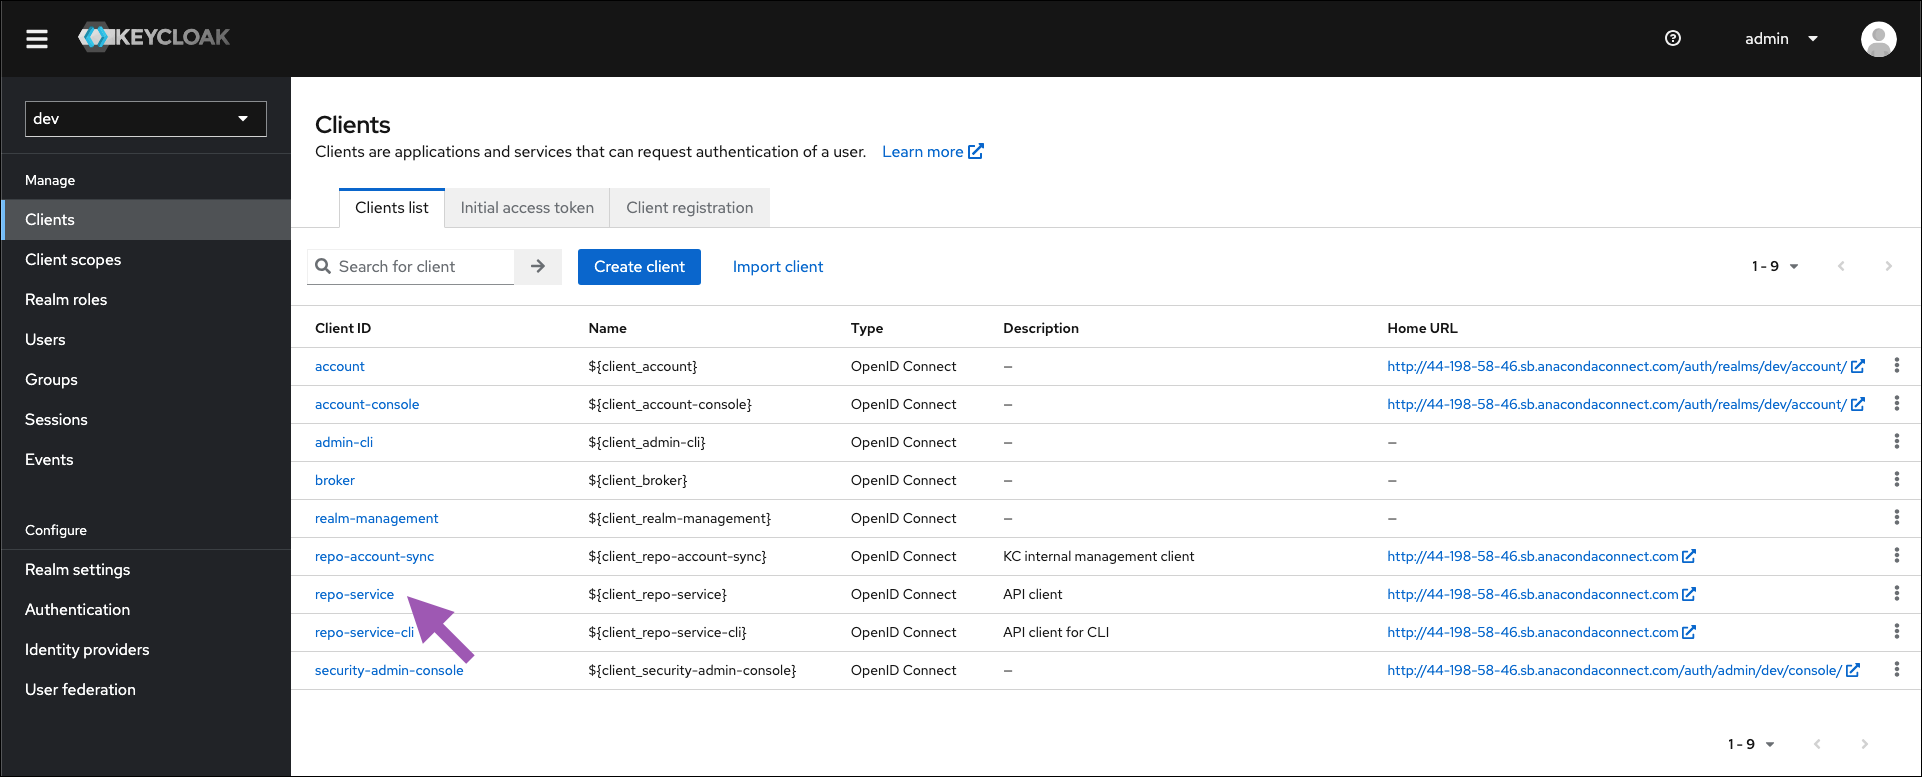
Select Clients from the left-hand navigation.
Select the repo-service client.
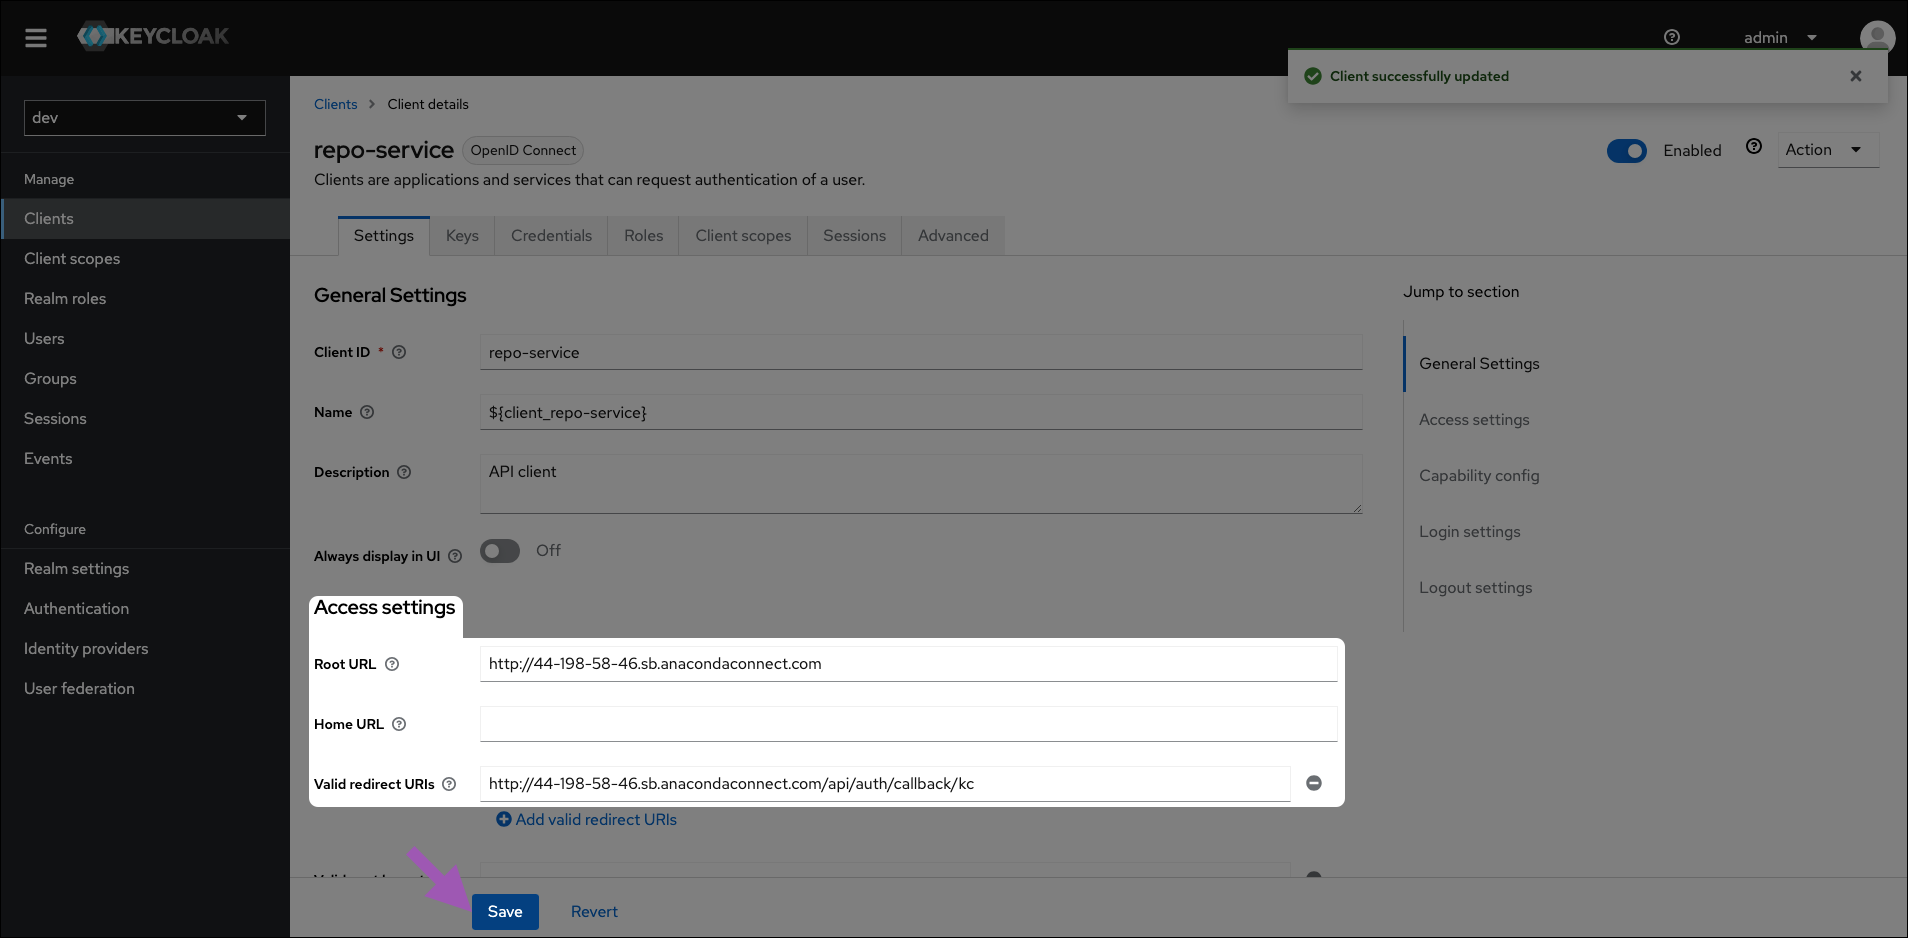
Update the Root URL to your new domain.
Prepend the Valid redirect URIs path with your new domain.
Click Save.
Tip
If Keycloak demands you also update the Backchannel logout URL, add your new domain to the field under Logout settings, then save your changes. Next, delete the entry you just made and attempt to save again.
If you are using SSL, update your certificates to refer to your new domain.
You can now log in to Anaconda Server normally.


