General artifacts#
Channels support the upload of a wide range of generic file types, allowing you to store and share resources. This flexibility makes channels versatile for various use cases, ensuring that different types of files can be managed and accessed as needed. For example, a Miniconda installer can be packaged in different formats depending on the platform, such as .exe or .dmg. By supporting multiple file types, channels enable seamless sharing of these platform-specific resources, making them easily accessible to others.
Warning
There is no built-in security check on uploaded artifacts. Performing manual security checks is strongly recommended. Administrators and users with upload permissions should verify file integrity before uploading to ensure they are safe and that no malicious files are present.
Accepted general artifact file types
.bz2
.conda
.deb
.egg
.exe
.gz
.ipynb
.json
.lz
.lzma
.msi
.rpm
.tar
.tbz
.tgz
.tlz
.txz
.whl
.xz
.yaml
.yml
.zip
Uploading general artifacts#
When uploading a general artifact file, you must assign it to an artifact group. In Package Security Manager, the group is considered to be the artifact itself, with the intent that each group contains variations of the same file for different platforms. Using our earlier example, if you want to upload Miniconda installers for distribution, you might create an artifact group called Miniconda Installers. If the group already exists, the uploaded file is included with the existing group’s files.
Select a channel that you want to upload a general resource artifact to.
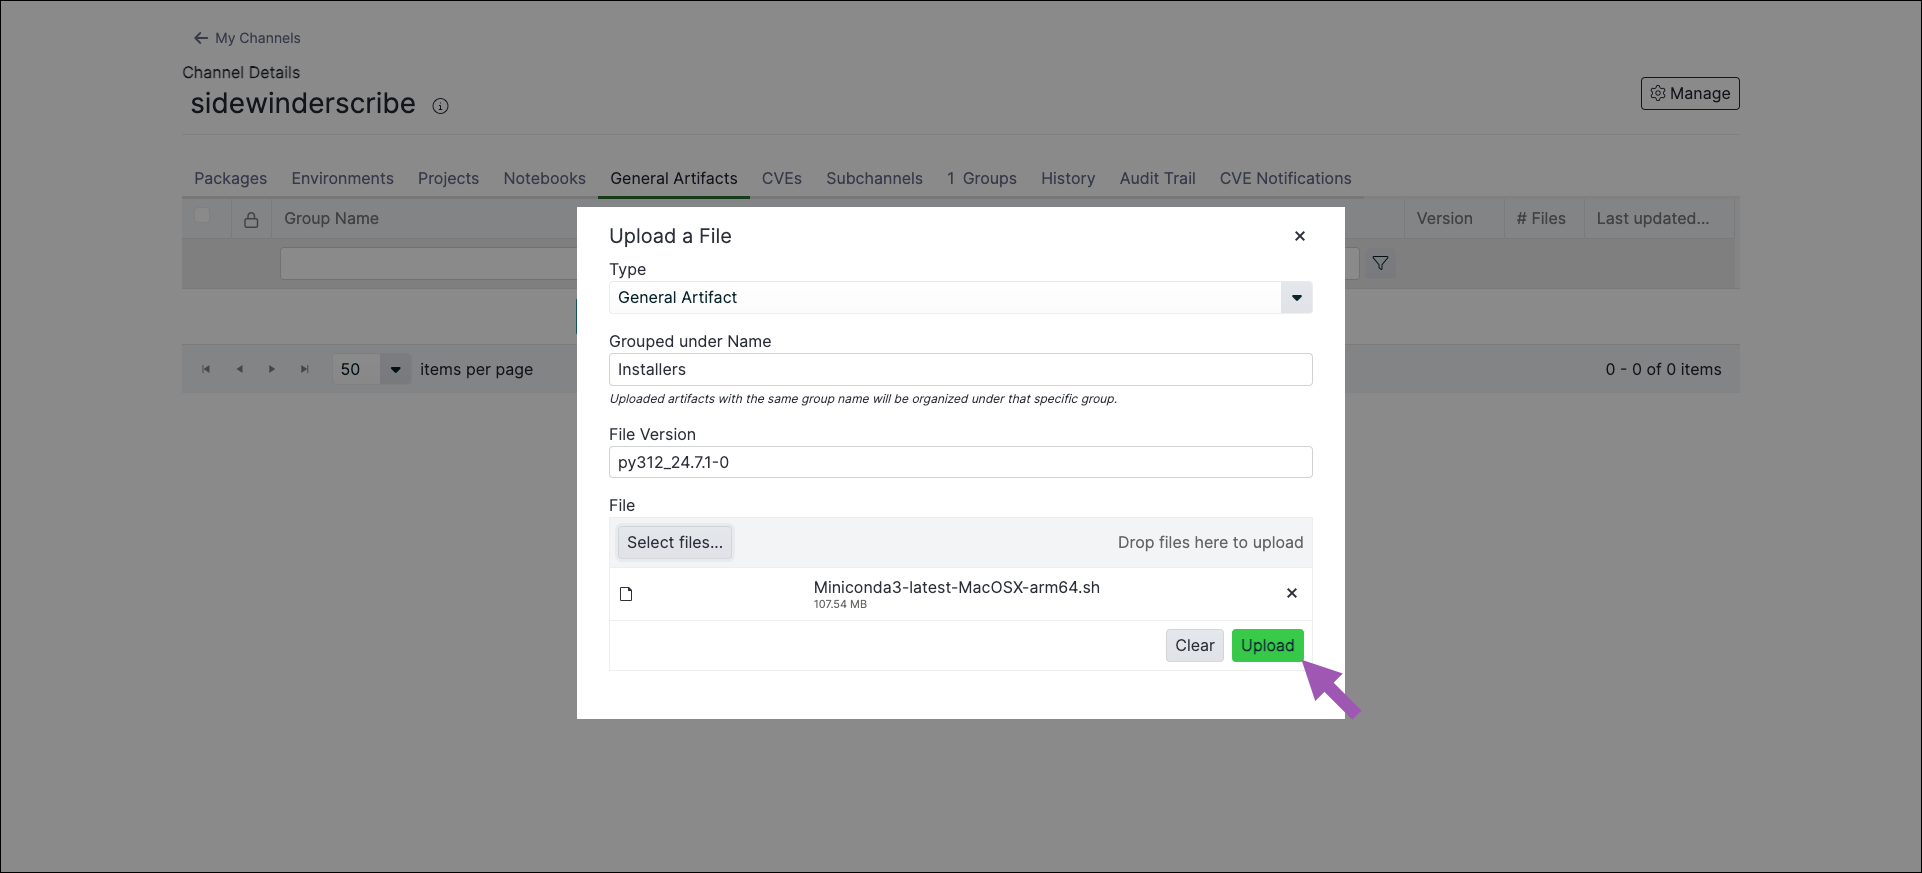
Open the Manage dropdown menu and select Upload File.
Open the Type dropdown menu and select General Artifact.
Establish a descriptive group name for your artifacts, or use an existing group to include your file in.
Click Select files…, then locate and upload your general resource artifact. Alternatively, you can drag and drop your general resource artifact into the field.
Click Upload.
Note
It is a known issue that uploading a file with an identical name as an existing one removes the original file from its artifact group and assigns it to a new group.
Managing general artifacts#
You can Copy, Move, or Delete entire groups of general artifacts, or the individual artifact files they contain.
To manage entire groups:
Select a channel you need to manage general artifacts for.
Select the General Artifacts tab.
Select the checkboxes beside group names. Management options appear at the top of the table.
Choose the action you want to take for the selected groups.
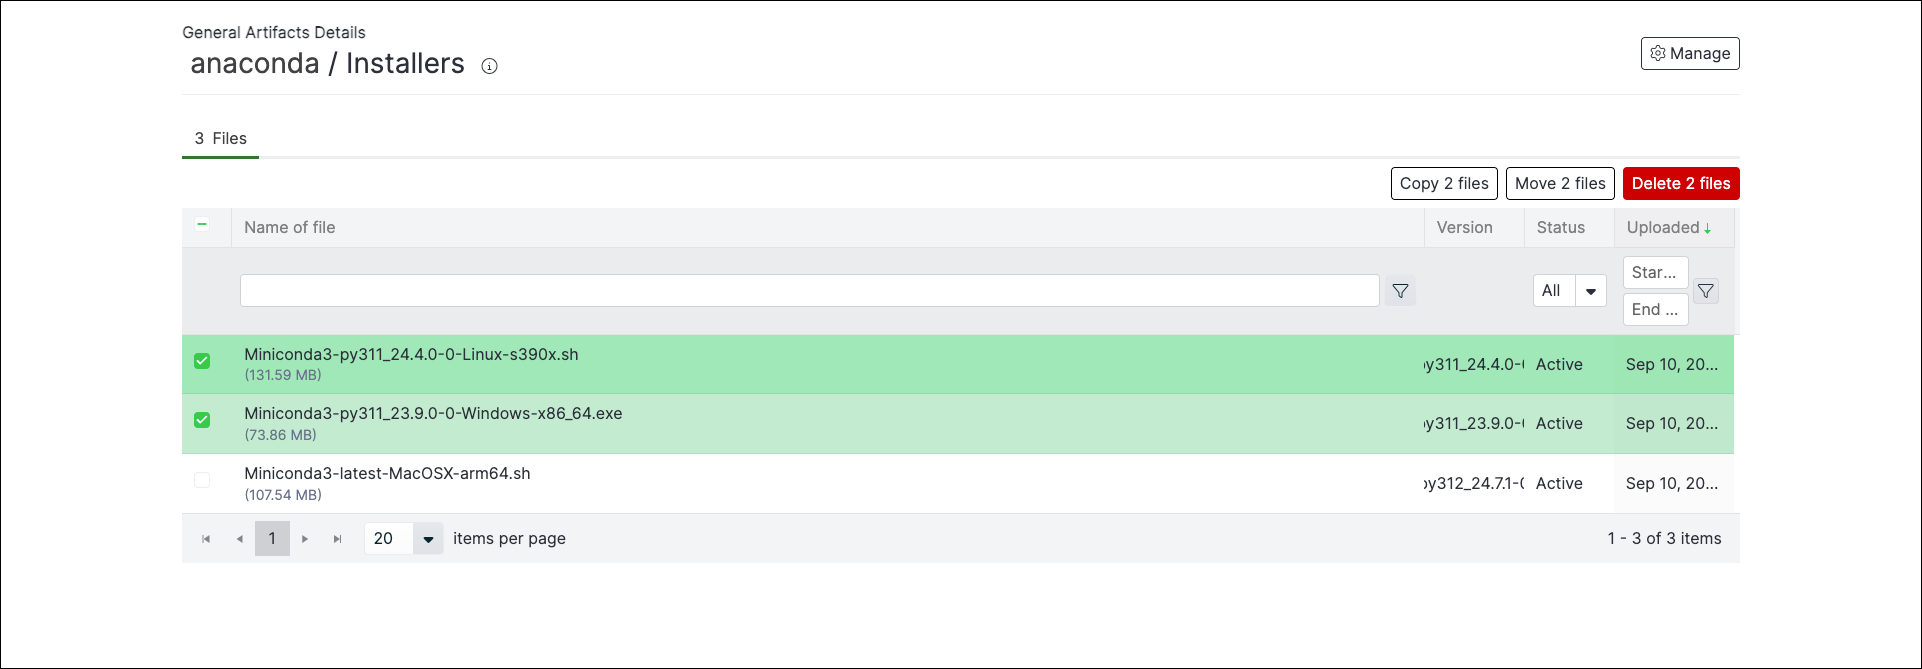
To manage files within a general artifact group:
Select a channel you need to manage general artifacts for.
Select the General Artifacts tab.
Click on a group name to view its files.
Select the checkboxes beside artifact names. Management options appear at the top of the table.
Choose the action you want to take for the selected files.
Note
You might need to refresh the page to see your changes.
Managing general artifacts via the CLI#
If you want to manage your channel uploads using the CLI, see Package Security Manager CLI.